
Do you need to build a staircase? Constructing a flight of stairs isn’t an easy task. There are building codes to consider, along with your choice of materials, and style of the staircase that will suit your home. As you can see, there’s a fair bit of planning that needs to go into the job.
If you fail to plan, then you plan to fail. Starting your planning well in advance of ordering the materials for the job ensures that you won’t have to make multiple trips to the hardware store for supplies.
When the planning’s complete, the good news is that it’s not too challenging to complete the build. All you need are basic carpentry skills and the right tools to build a magnificent set of stairs. Before you start, let’s look at the essential components of a staircase.
The Basic Characteristics of a Staircase
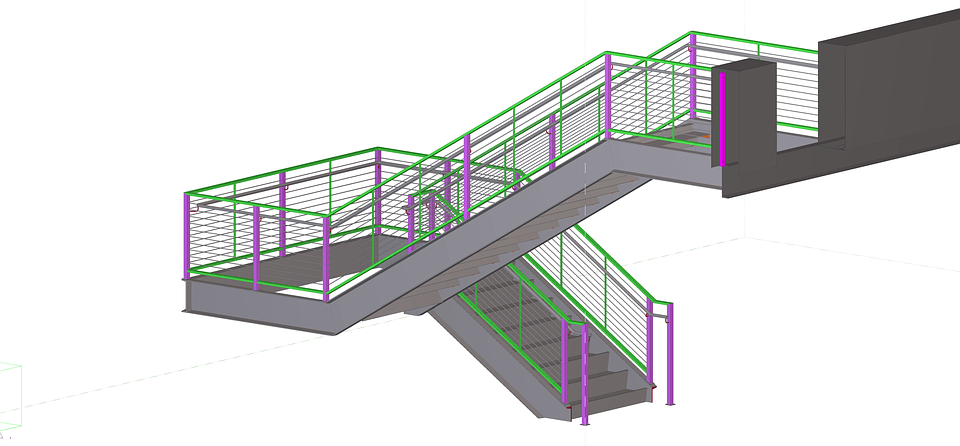
A staircase has three primary components; the stringer, treads, and riser. The stringers are sloped boards, typically 2 x 12’s placed around 16 inches apart, and their function is to carry the weight of people using the stairs. The broader you build the stringers, the more comfortable the staircase is to traverse and the more stable it will be under heavy loads, as a rule of thumb; make them no less than 4 feet wide.
Risers protect the stringers from harsh environmental conditions, while treads form the top of the stair, the part that you step on when climbing a flight of stairs. The rises meet the lip of the tread and provide further support to the staircase. Some carpenters choose not to use risers on their staircase construction. However, make sure that you install them on your staircase. Leaving out the risers creates a tripping hazard and could land you in trouble with your local county planning office if someone is injured on the stairs, especially if you’re installing them on a publicly used property, or a guesthouse. Without risers, the stringers will crack quickly, therefore; treat your wood with a protective coating before installation.
Before you pick up your tools and start sawing wood, check with your local planning office for any health and safety guidelines you need to follow during construction. Once you’ve checked with the office, it’s time to decide what kind of stairs will suit you best.
1. Straight and Simple
For a classic look that’s cost-effective, consider a straight staircase. They’re the easiest to build, which is what makes this style such a popular choice. Treads are placed straight across the trajectory and evenly spaced. This staircase doesn’t require a landing, which makes them the ideal choice for minimalist homes and doesn’t create a barrier between floors.
2. An Arch
For an elegant design, choose an arched staircase. The treads for these stairs are cut in wedges, with a less prominent tapering due to the visual appearance of the arch. These stairs are graceful and suit foyers, as well as entranceways. If you need stairs that make a statement, try an arch for a grand impression. An arched staircase is the most challenging style to build because all of the components require careful calculations to ensure all the parts, including the rails, line up correctly.
3. The Winder
Winder staircases use wedge-shaped treads as well. However, the difference in this staircase is the 180-degree or 90-degree rotation that does away with the landing. A winder creates an impressive visual in a modern home, or office, producing fluid lines and a seamless changeover from one floor to the other. Winders take up less space than traditional staircases, making them a popular choice for duplexes and smaller homes. This staircase creates a dramatic visual effect for guests to marvel over, but it’s one of the most challenging designs to build.
4. Corner Staircase
Also known as an “L-shaped” staircase, the corner design is a simple construction. The stair treads line up in a straight fashion, with the landing rotating 90-degrees to form the “L.” This staircase often has multiple landings and is an ideal choice for homes or offices that have more than two floors. A corner staircase requires extra support from the risers due to the large landing area, increasing building costs.
5. The Downward Spiral
This spiral is an attractive design frequently used in contemporary and modern homes. The shape of the staircase resembles a coiled spring, with wedge-shaped treads revolving around a center post. Suitable for loft and studio apartments, this style of staircase suits living and working areas that are limited in space. The small width of the treads in this design means that only one person can traverse the staircase at a time and it makes it challenging to carry large items, like a couch, up or down the stairs.
6. The Half Landing
The style changes the direction of the staircase by 180-degrees, with a landing dividing the treads in half. This design is practical and simple to build, with one of the lowest construction costs of the models mentioned so far. Half landings are best suited for homes that have several floors and tall ceilings.
Time to Get Started
Once you’ve picked your design, it’s time to get started with the build. Review your plans thoroughly before you start and ensure that you have the right tools to get the job done correctly and efficiently.
Step 1: Measuring Up
Start the task by calculating the entire height of the staircase, also known as the total area coverage for the rise of the stairs. Extend a straight board from the landing riser and measure downwards to the location of the landing. After completing this critical step, calculate the rise of each step by dividing the total rise by 7, the standard amount of steps per stringer. Round the figure down and divide the figure by the number of steps you want to install.
This information gives you the total run of your staircase, in other words, the entire horizontal distance the stairs cover as it ascends. Multiply the run by the total amount of steps and make sure that you are close to the optimal figure of 10-inches for each step. This measurement gives you sufficient space to fit 2 x 6 treads.
If you are using a tall deck, it’s a wise idea to split up the staircase with multiple landings. Stringers are generally limited to 16 feet in length, meaning that you can install around 4 steps per stringer. 8 Steps per riser provide the best support and ensure your staircase is sturdy.
Step 2: Cutting
Before you start cutting, remember the old carpentry rule; Measure twice and cut once. Making a mistake with your measurements will cost you time and money, so make sure you do it right the first time.
Start by determining where the stringers will join the landing. You can attach them to the rim joist for a flush finish, or underneath to the frame of the landing. If you choose to join them under the deck, cut the stringers long to reach the frame, and place blocking between the joists for maximum support and safety.
Use a framing square to mark the tread notches. Ensure that your framing square has stair gauges that enable you to lock the square in place, allowing you to score consecutive notches identically. Clamp a gauge on the tongue of the square at the riser dimension and then attach another gauge to the squares body at the run measurement.
Place the square on the tread board and press it against the edge, using a scribing tool to mark the riser and tread board. Repeat the process for all of the required notches. Use a circular saw to cut out the notches and finish them off with a quality cordless jigsaw and use the first stringer for a template to cut the others. Screw the treads into the frame blocks and check the level, using a planer to remove high spots.
Step 3: Installation
Use 2.5-inch countersunk trim-head decking screws to fasten the rises to the stringers after you’ve cut them to length. For an impressive finish, cut the treads and risers to overhang the stringers by 1.25-inches and nail a cedar trimming board flush to the surface. Once you’ve installed the risers, fasten the treads in place with more countersunk screws, working your way up the staircase. Remember to leave a ¼-inch spacing between the treads for the posts. Bolt the posts to the stringer and install the handrail. That’s it, job done.
Get Professional Help
Building a staircase takes time. If you don’t have a moment to spare due to your busy lifestyle, it’s better to employ a professional to get the job done right and in as short a space of time as possible.

Professionals guarantee their work and ensure a staircase built to perfection. If you don’t want to manufacture your staircase from scratch, consider purchasing ready made stairs online UK retailers have to offer. Pre-manufactured stairs are easy to assemble and save you the hassle of buying tools and plans.


