
Have you ever wished to skip on barbershop appointments and just have a fresh haircut wherever, whenever and become your own barber?
I know it can sound blasphemous to some…but being your own barber is not that hard. Especially if you’re not looking for fancy, complicated hairstyles.
Here’s the catch, though: many people think that grabbing cheap $15 clippers off the shelves will yield fantastic results. That’s a bit ambitious, isn’t it?
In this concise become your own barber guide I’ll guide you through the hair clipper basics so you can get timely, quality cuts at your own convenience.
Step 1: know your brands
Just any clipper won’t do. There’s what you’d call “The Big 3 of hair cutters” – Wahl, Andis and Oster. Recently, Remington has also put out quite good, affordable models too.
Whichever of these you pick, you’re getting quality results. Wahl are probably the most popular due to their versatile models, including a lot of home haircutting kits like the Elite Pro or Deluxe Pro.
As far as the price range goes, a budget of $30 to $50 should be more than enough for basic home needs. If you think about it, that’s the price of two haircuts. Quite the deal, right?
Step 2: know your needs
Do you prefer mobility, or rather sturdiness?
Hair Clippers can come in corded or cordless modes. Wireless clippers usually are lightweight, maneuverable and give you the freedom to shape your haircut without worrying about tangled cabels.
In turn, however, most corded clippers are more solidly built and a bit more powerful. To be honest, quite a few of them also have lengthy cords – at least 8 or 9 feet.
The choice is up to you. Just remember that if you’re going cordless, you want to see a Lithium-Ion battery type. These batteries are long-lasting and hold their charge better.
Most Lithium-Ion powered clippers will run anywhere from 40 minutes to 80 minutes. Remington’s HC4250 or Wahl’s Lithium Ion clipper are both a good example of well-priced, cordless clippers.
Step 3: know your cutting lengths
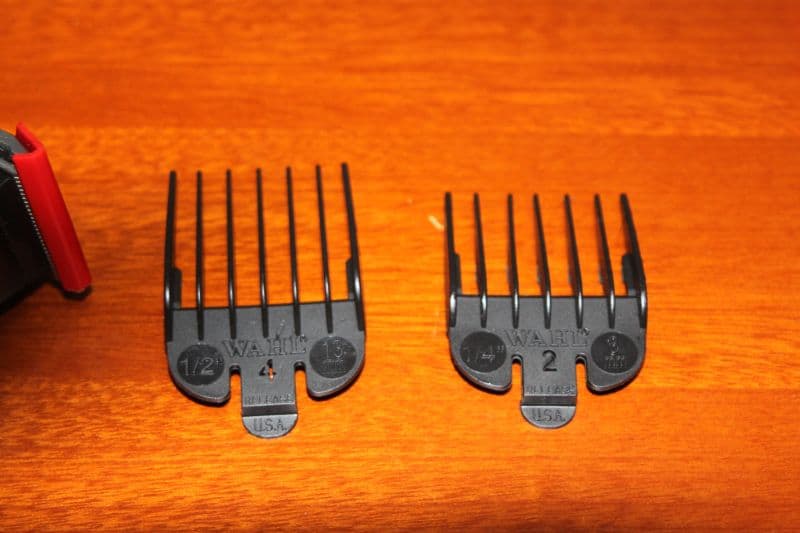
A lot of people get confused around hair clipper guards. As the guys from HairClippersClub elaborate, cutting lengths very easy to follow!
Tip #1: remember that the measure you see on them shows how much hair will be left after you cut with them!
Tip #2: all brands follow the same numeration of 0 to 8 for their typical guards.
A 0 guard will leave your hair at 1/16″ (1.5mm). Guard #8 will leave it at 1″ (25 mm). Luckily for you, usually the guards have their lengths written on them.
Not to mention you can easily see the difference in the combs, like these ones:
Easy, right?
Step 4: know the basic technicalities
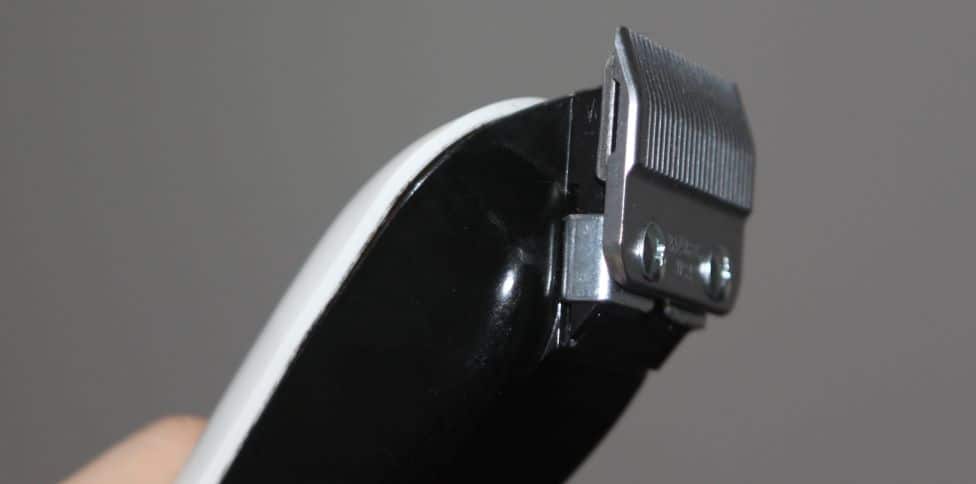
Have you ever thought how some barbers blend hair so masterfully?
Take a closer look at some clipper models. Do you see the lever on their side? Here’s a picture for your convenience:
This lever right there is what helps texturize and taper hair. If you push it up, it’ll bring the blades closer, for a closer cut.
And respectively, if you push it down, it will leave your hair longer.
So, you can put a #1 guard (1/8″) on your clipper. Then, you pull up the lever, and it’ll cut at just below 1/16″ instead, as the blades have been brought closer.
Simple, yet effective, right?
Speaking of technicalities, never forget oiling and maintaining your clippers. A tube of clipper oil is ridiculously cheap and will take care of your cutter’s performance for a long time.
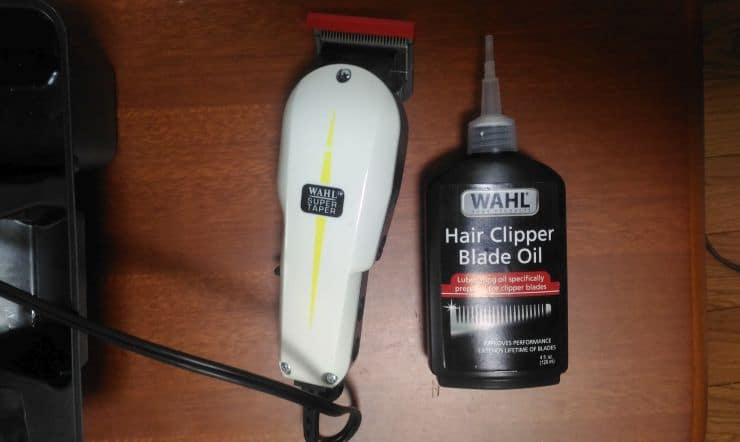
Just apply a few drops and run the clipper so they get spread across the blades properly. Do it every few times (depending on your haircuts!) and you’re set.
As for cleaning…some cordless clippers are washable. Indeed, you can just rinse them under the tap and they’ve been taken care of. With others, however, I recommend you use a small brush – most models come with one included.
By gently going with it over the blades and between them, you should remove leftover hair. Otherwise it’ll clutter between and inside the blades, making them dull and reducing their lifespan.
Conclusion: Become your Own Barber
Using just these basic pointers, you’re more than good to go for some quality home haircutting action. The first few times, probably you’ll make a few blunders. You’ll need to go through your hair twice or thrice, because you missed a few spots.
We’ve all been through this. It takes just a little bit of practice, though, and you’ll be able to do your own haircut in 5 to 10 minutes.
No appointments, no waiting times, just total hairstyle convenience.
Not to mention it’s fun and makes you feel in charge. Who doesn’t love that?


